Managing Microsoft 365 apps requires you to have knowledge of apps in Azure AD. With the Microsoft 365 REST APIs, users can grant apps access to their Microsoft 365 data, like mail, calendars, contacts, users, groups, files, and folders.
By default, users need to individually grant permissions to each app, but this doesn’t scale well if you want to authorize an app once at the global administrator level and roll it out to your whole organization through the app launcher. To do this, you must register the app in Azure AD.
Azure AD enables easy integration to many of today’s popular software as a service (SaaS) applications; To help integrate your applications with Azure Active Directory, we have developed a simple tutorial that walks through the configuration steps. In case you have more complex application authentication and access management workflow, please refer to the Microsoft documentation page.
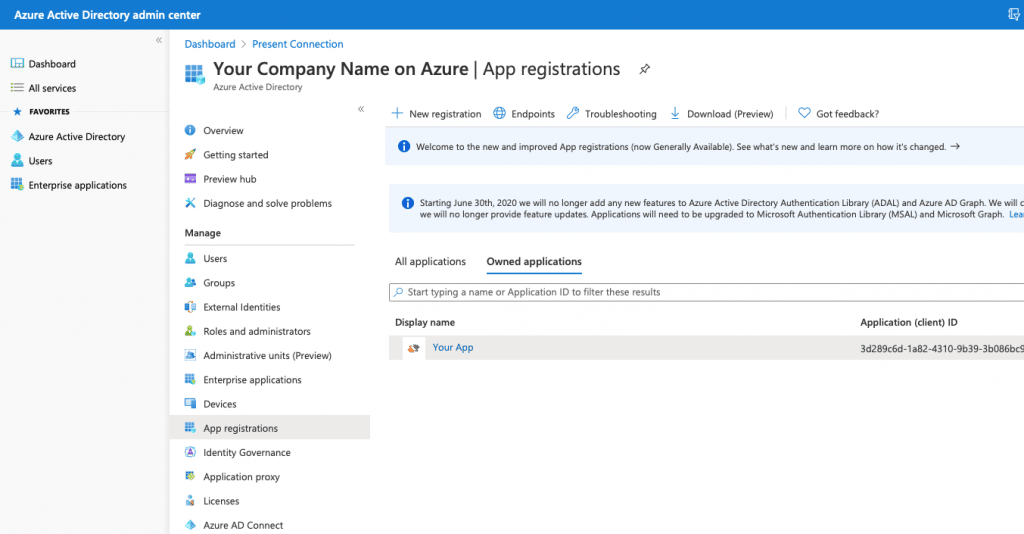
STEP 1 – Create an application on your Azure Active Directory.
From Microsoft 365 admin center you can click on “Azure Active Directory” link or just go to https://aad.portal.azure.com/ using your favourite browser.
Press the “New registration” button and fill in the information as shown in the image below. You just need to provide an application name and in section “Redirect URI (optional) provide URL https://api.codemash.io/auth/aad and that’s about it. Press the “Register” button and we are almost done.
Microsoft Azure Active Dir registers your new application. The Overview page shows the most relevant information we are going to copy & paste to CodeMash, but before we need to add a couple more URLs to work it properly. In order to allow log out for our application, you need to add logout URL https://api.codemah.io/auth/logout into “Logout URL” section. In addition, you can add the following URL https://hub.codemash.io/shared/forms/auth/aad, this allows you to make any type of data form which can be accessed by the user who has right permissions.
If you need more guidance on how to register application in Azure, how to work with API permissions (delegated or application), how to grant admin consent, and other important security topics, please follow the link.
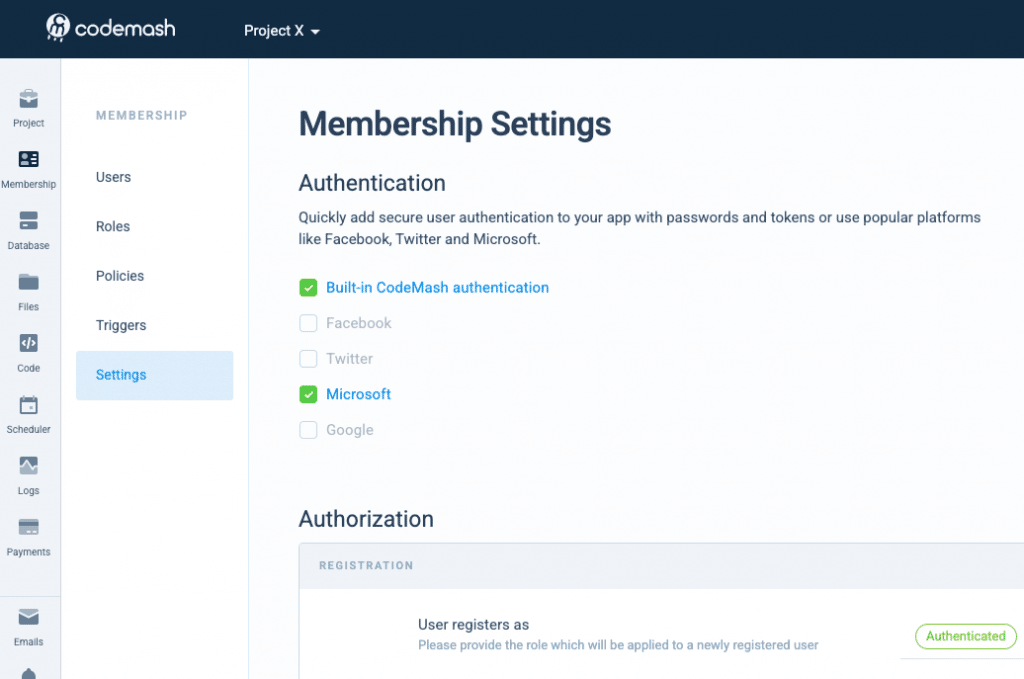
STEP 2 – Connect to Azure Active Directory with your CodeMash application.
This should be a pretty straightforward solution. Just go to your project and open the Membership module. Open Settings and you can find connections under the Authentication section. Just click a tickbox on “Microsoft”, it will open connection preferences.
By opening connection preferences you need to incorporate Azure Active Dir settings into CodeMash. So you need to enter Client ID, Client Secret, and Tenant ID. As we mentioned before you can find them in the Overview section of Azure application.
In order to work with Microsoft Graph API properly, you should enter your Tenant ID again into API section as shown below.
Congratulations, you have established a connection between Microsoft Active Dir and CodeMash. In case you have more advanced topics to cover, please follow our technical documentation.